👮 Users and Roles
SaaSykit provides a simple user and role management system, that allows you to give granular access to your application to your team members.
Users
To access the user management system, using an admin account, under "User Management", click on the "Users" link in the sidebar.
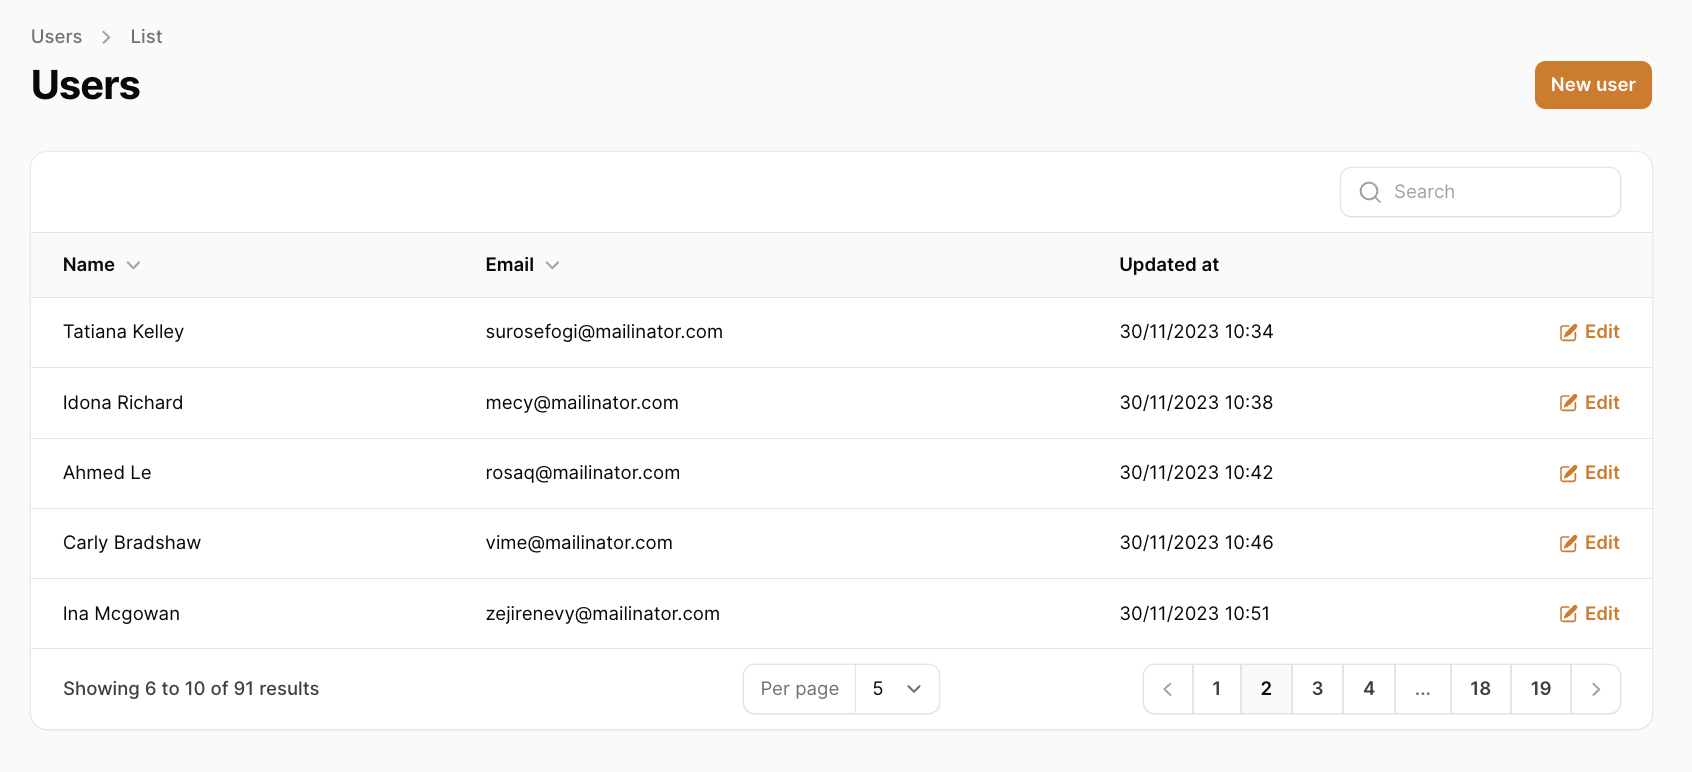
A user can be both a team member of yours and/or a customer of your application.
Each user has a "dashboard" where they can see their subscriptions, billings, edit their profile, etc. This dashboard is accessible at /dashboard route.
If the user is an admin, they can also access the admin dashboard at /admin route, where they can manage the application depending on the roles they have.
Creating a User
To create a user, click on the "New User" button on the top right corner of the page.
You will be presented with a form to fill in the user details.
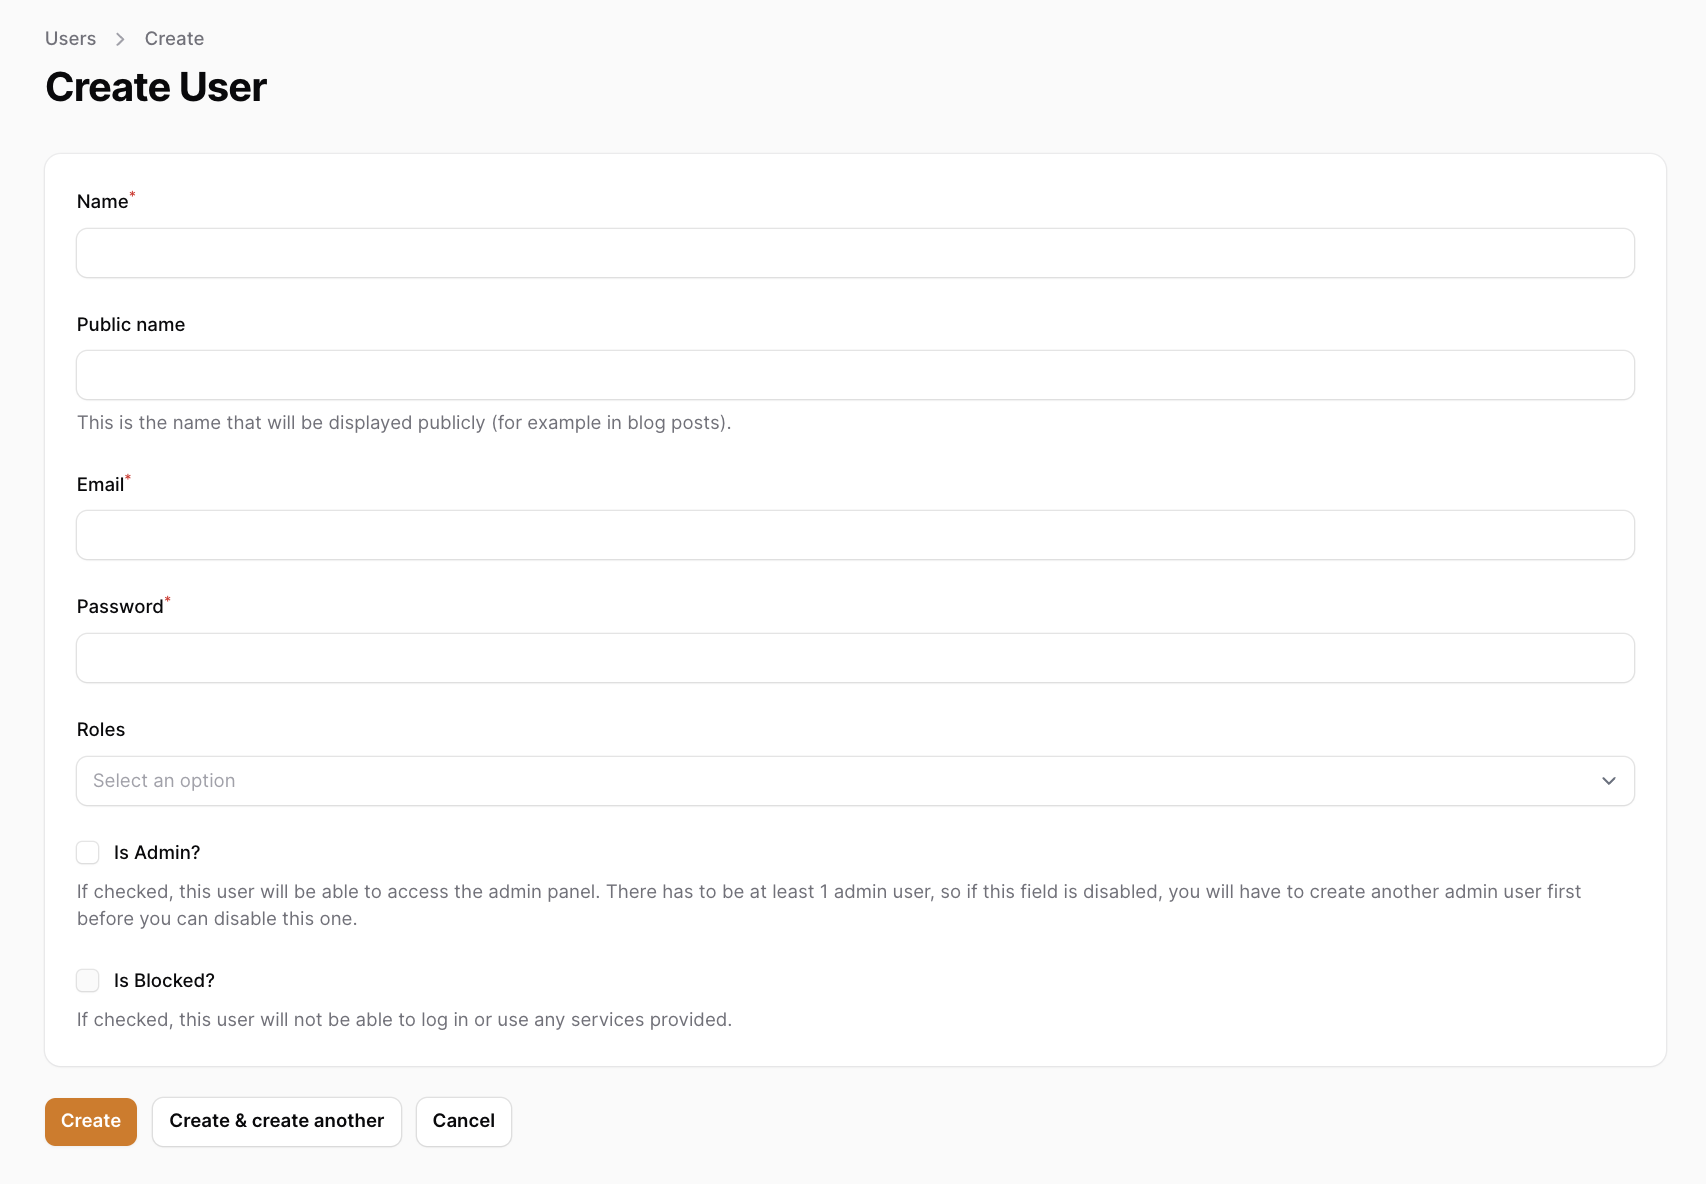
You can enter the following details about your new user:
- Name: The name of the user.
- Public name: The public name of the user. This is the name that will be displayed on blog pages in case the user is a blog author.
- Email: The email of the user. This will be used to login to the application.
- Password: The password of the user. This will be used to login to the application.
- Roles: The roles of the user. A user can have multiple roles. The roles will determine what the user can do in the application.
- Is Admin: Whether the user is an admin or not. If the user is an admin, they will be able to access the admin dashboard at
/adminroute. - Is Blocked: Whether the user is blocked or not. If the user is blocked, they will not be able to login to the application.
You need to check the "Is Admin" checkbox if you want the user to be able to access the admin dashboard, and then select the roles that you want the user to have.
It's not enough to just select the roles, you also need to check the "Is Admin" checkbox.
You can easily edit a user by clicking on the "Edit" button on the right side of the user row and you will be presented with the same form that you used to create the user.
Roles
To access the role management system, using an admin account, under "User Management", click on the "Roles" link in the sidebar.
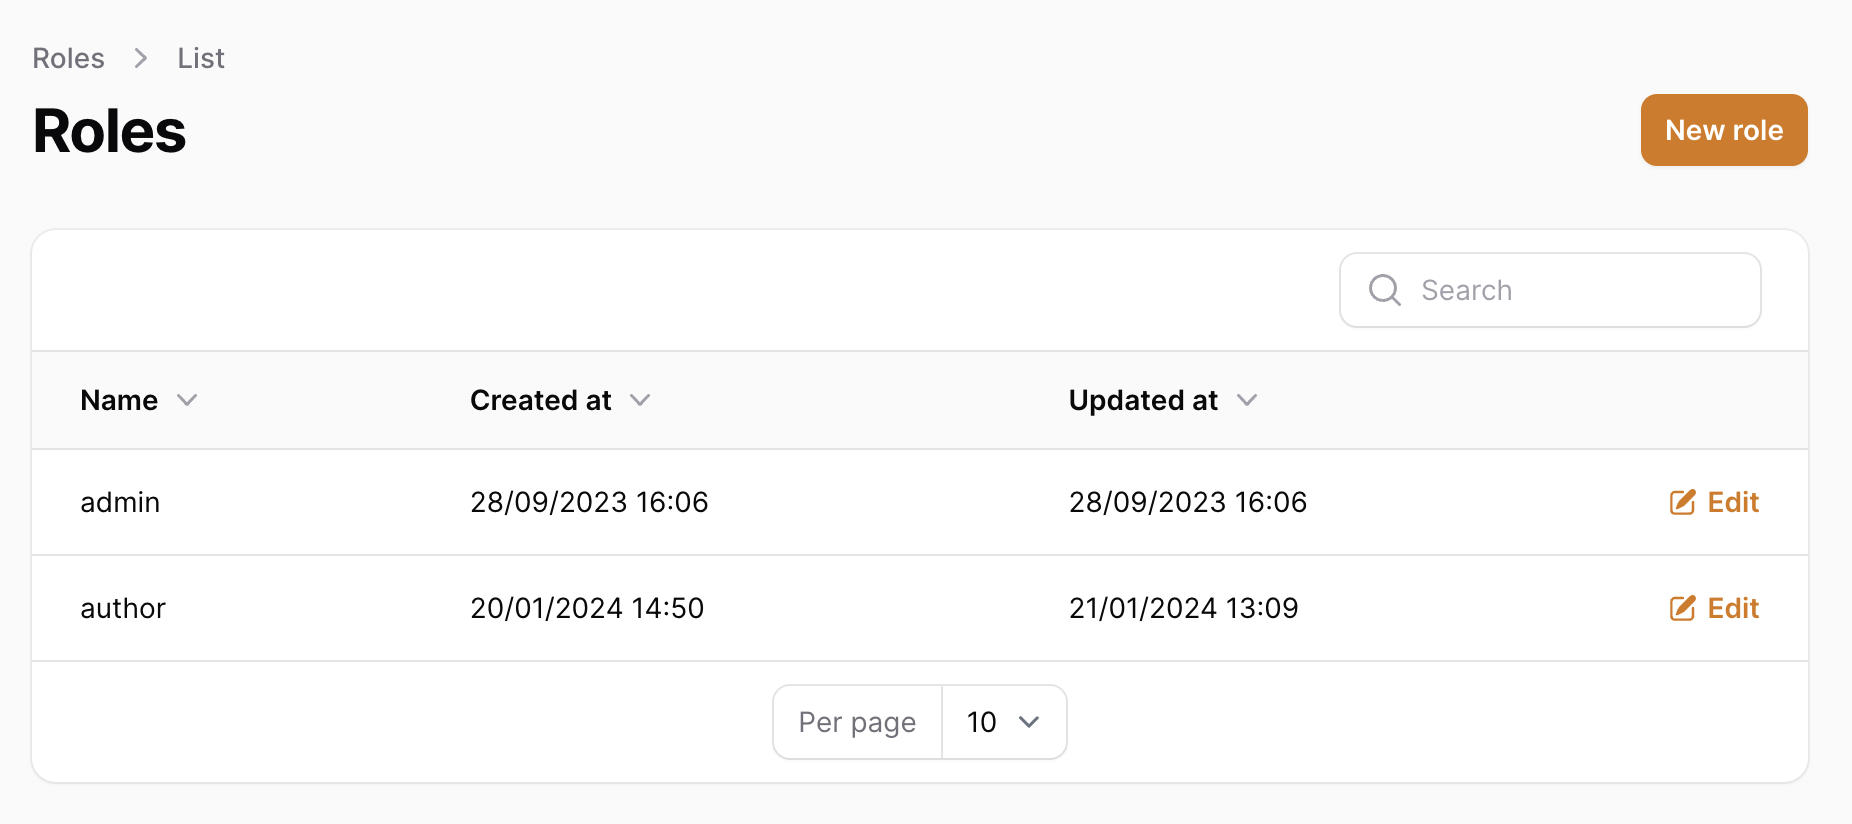
A role is a set of permissions that you can assign to a user. A user can have multiple roles.
Creating a Role / Editing a Role
To create a role, click on the "New Role" button on the top right corner of the page.
To edit a role, click on the "Edit" button on the right side of the role row.
You will be presented with a form to fill in the role details.
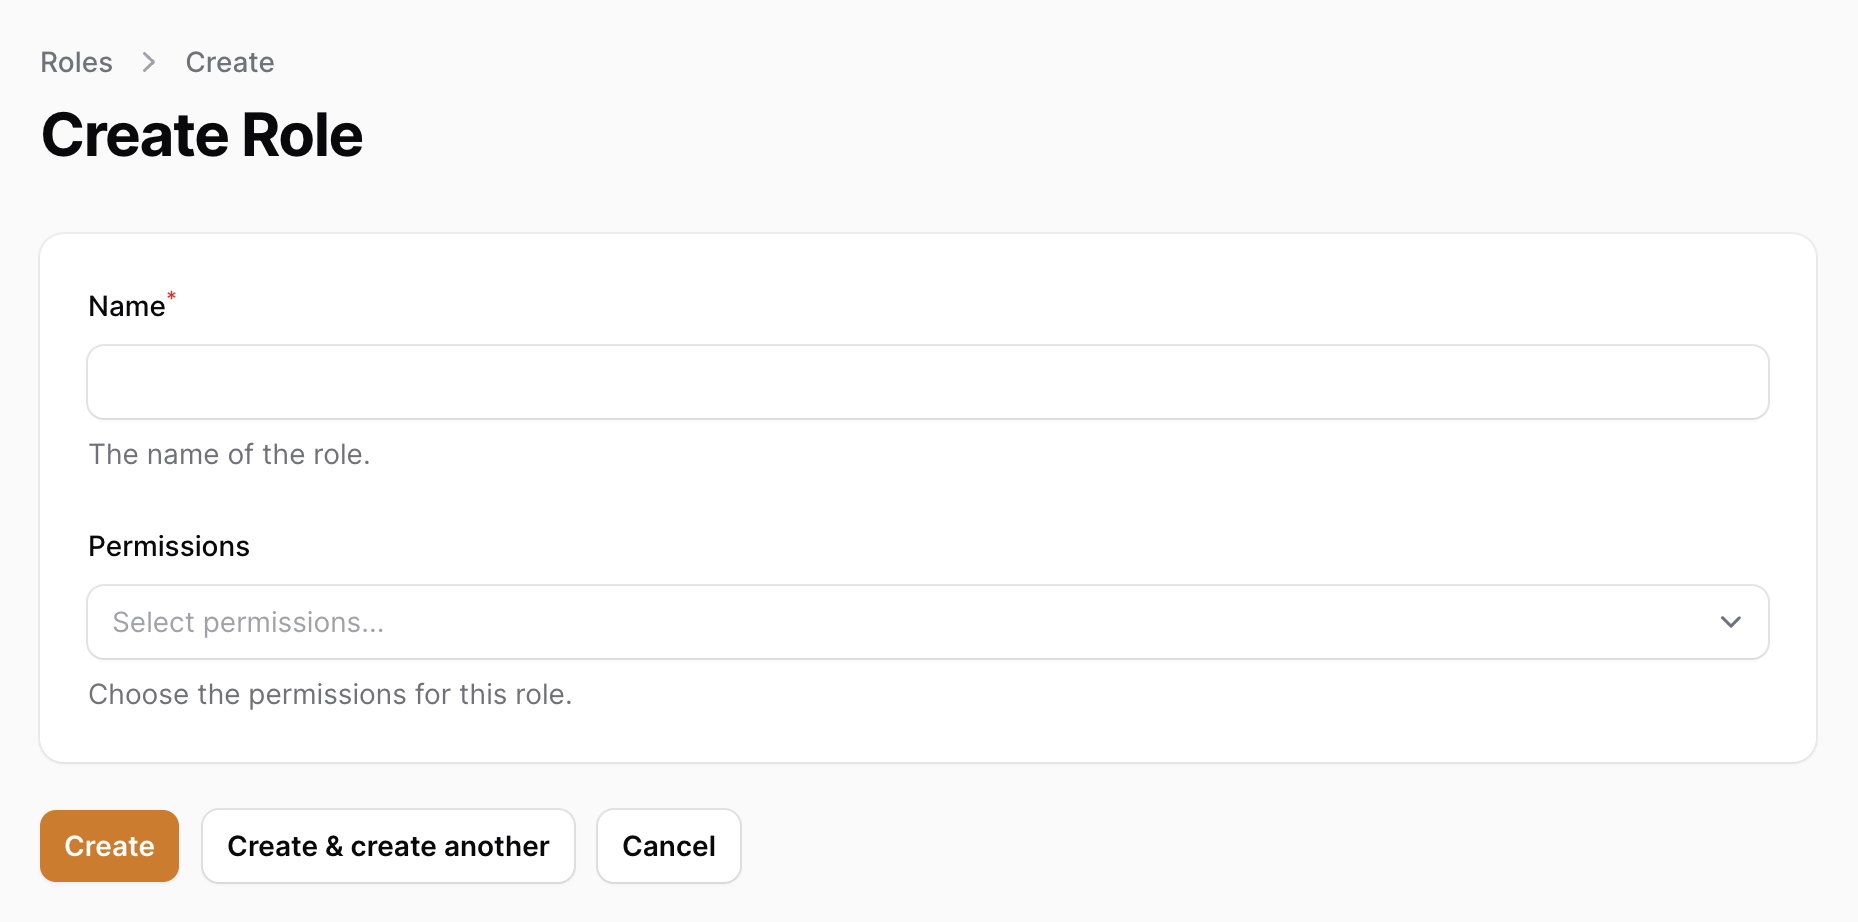
You can enter the following details about your new role:
- Name: The name of the role.
- Permissions: The permissions of the role. A role can have multiple permissions. The permissions will determine what the user can do in the application.
Permissions are human readable and self explanatory, for each part of the application there is typically a create, view, update and delete permission.
For example, for the users part of the application, there are the following permissions:
create usersview usersupdate usersdelete users
The same goes with roles, products, plans, discounts, settings, blog, transactions, subscriptions, etc.
SaaSykit comes with many permissions out of the box that allow you to give granular access to your application to your team members covering all of the use cases and parts of your application.
Creating more permissions
If you want to create more permissions, you can do so by editing the database/seeders/RolesAndPermissionsSeeder.php file.
Once done, you will need to run the following command to seed the new permissions:
php artisan db:seed --class=DatabaseSeeder
This command is already part of the deployment process, so you don't need to worry about it when deploying your application.