Stripe
Configuration
SaaSykit comes with support for Stripe out of the box. This allows you to start accepting payments from your customers right away.
Check out the video below to see how you can configure Stripe in your SaaSykit application, display plans and go through the checkout process in a few minutes.
First, you will need to create a Stripe account. Once you have created your account, you will need to get your credentials from Stripe.
In the Admin Panel and under "Settings" click on "Payment Providers". You will be redirected to the payment providers settings page.
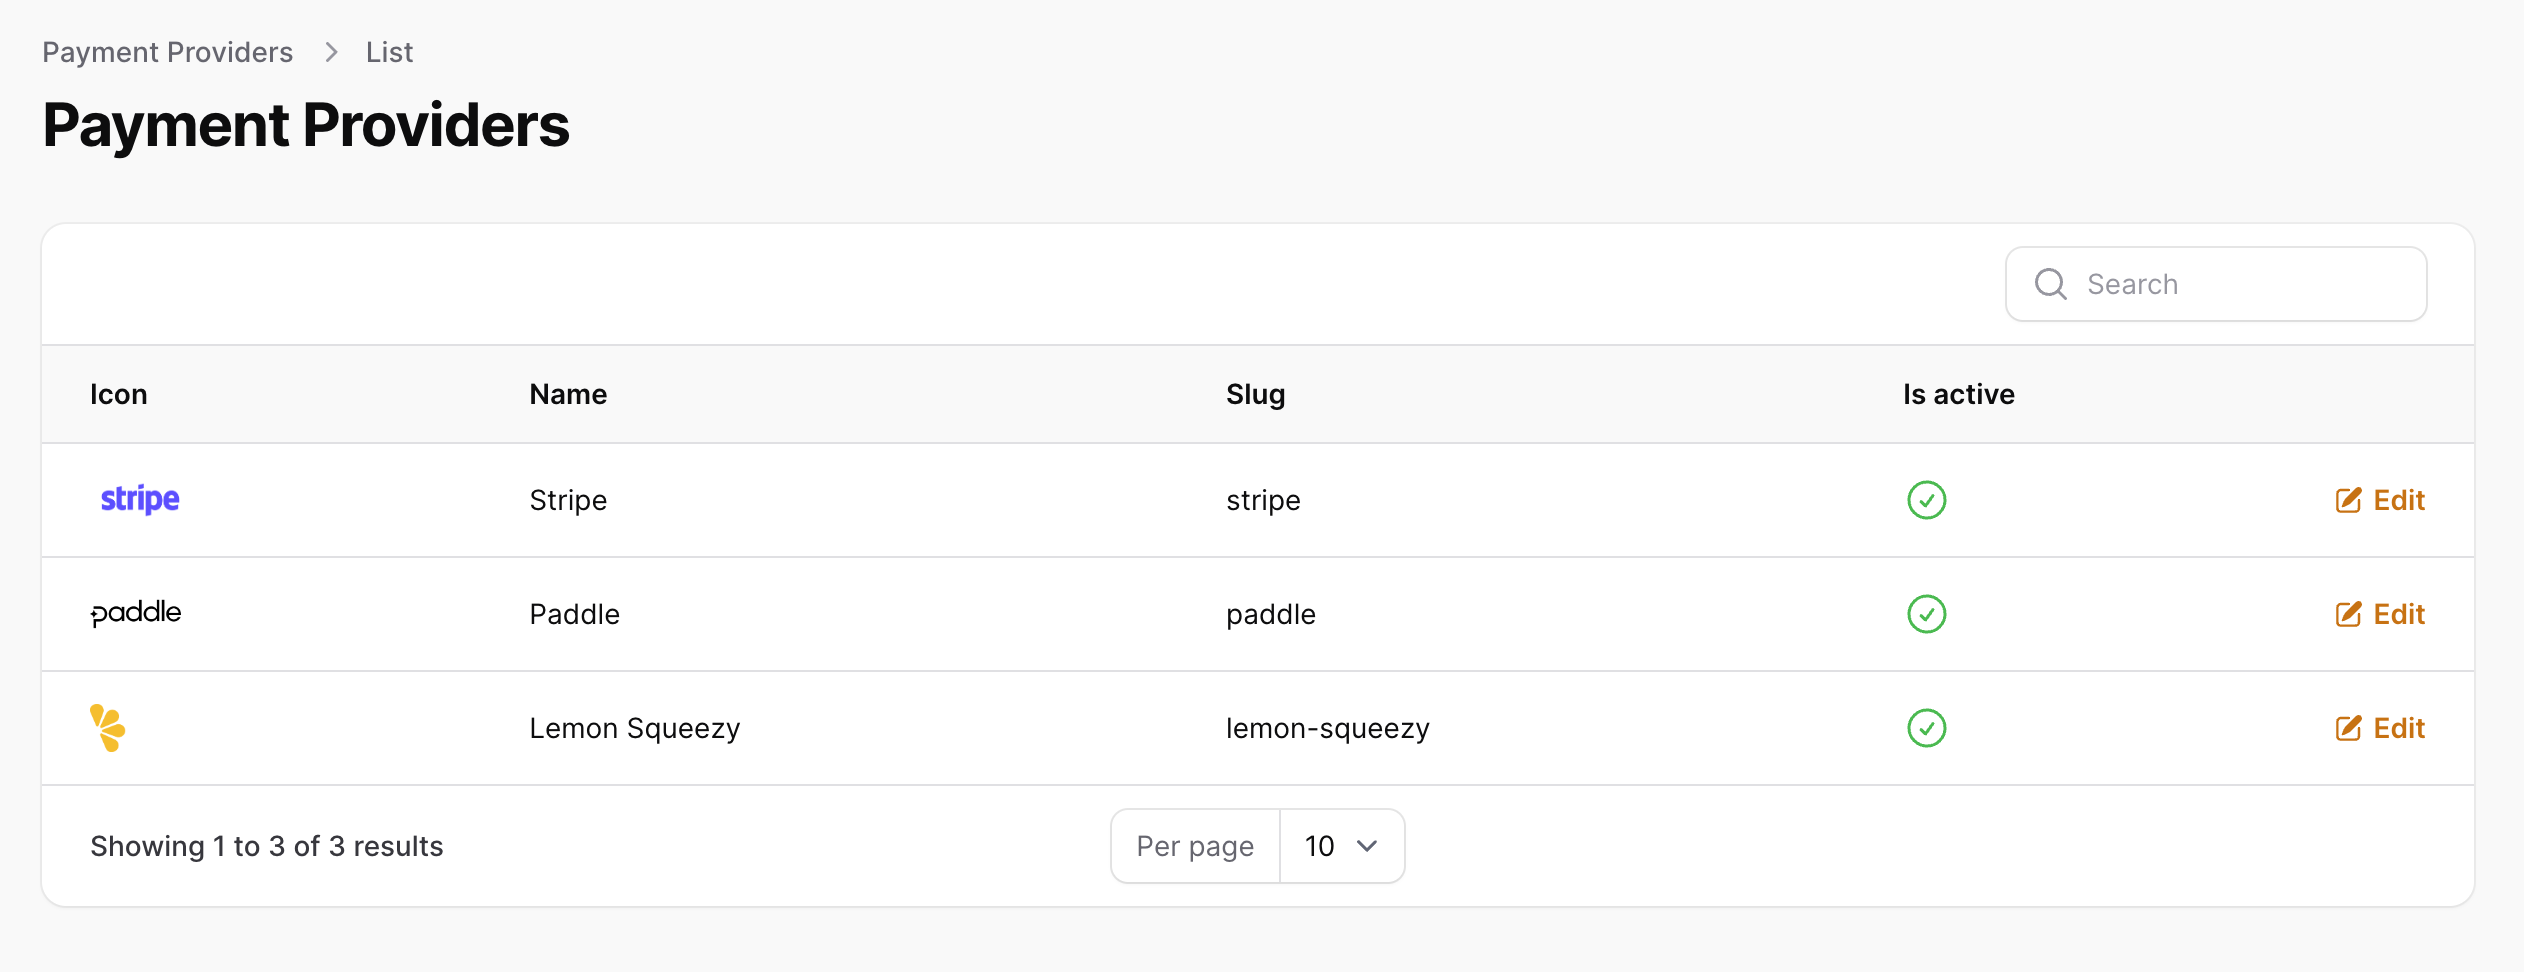
Click on "Stripe" and using the toggle "is active" you can enable/disable the payment provider. (Don't forget to click "Save" after you make any changes).
Once you enable Stripe, you will need to configure the credentials for it. To do that, click on the payment provider you want to configure, then click on "Edit credentials". You will be redirected to the payment provider credentials page.
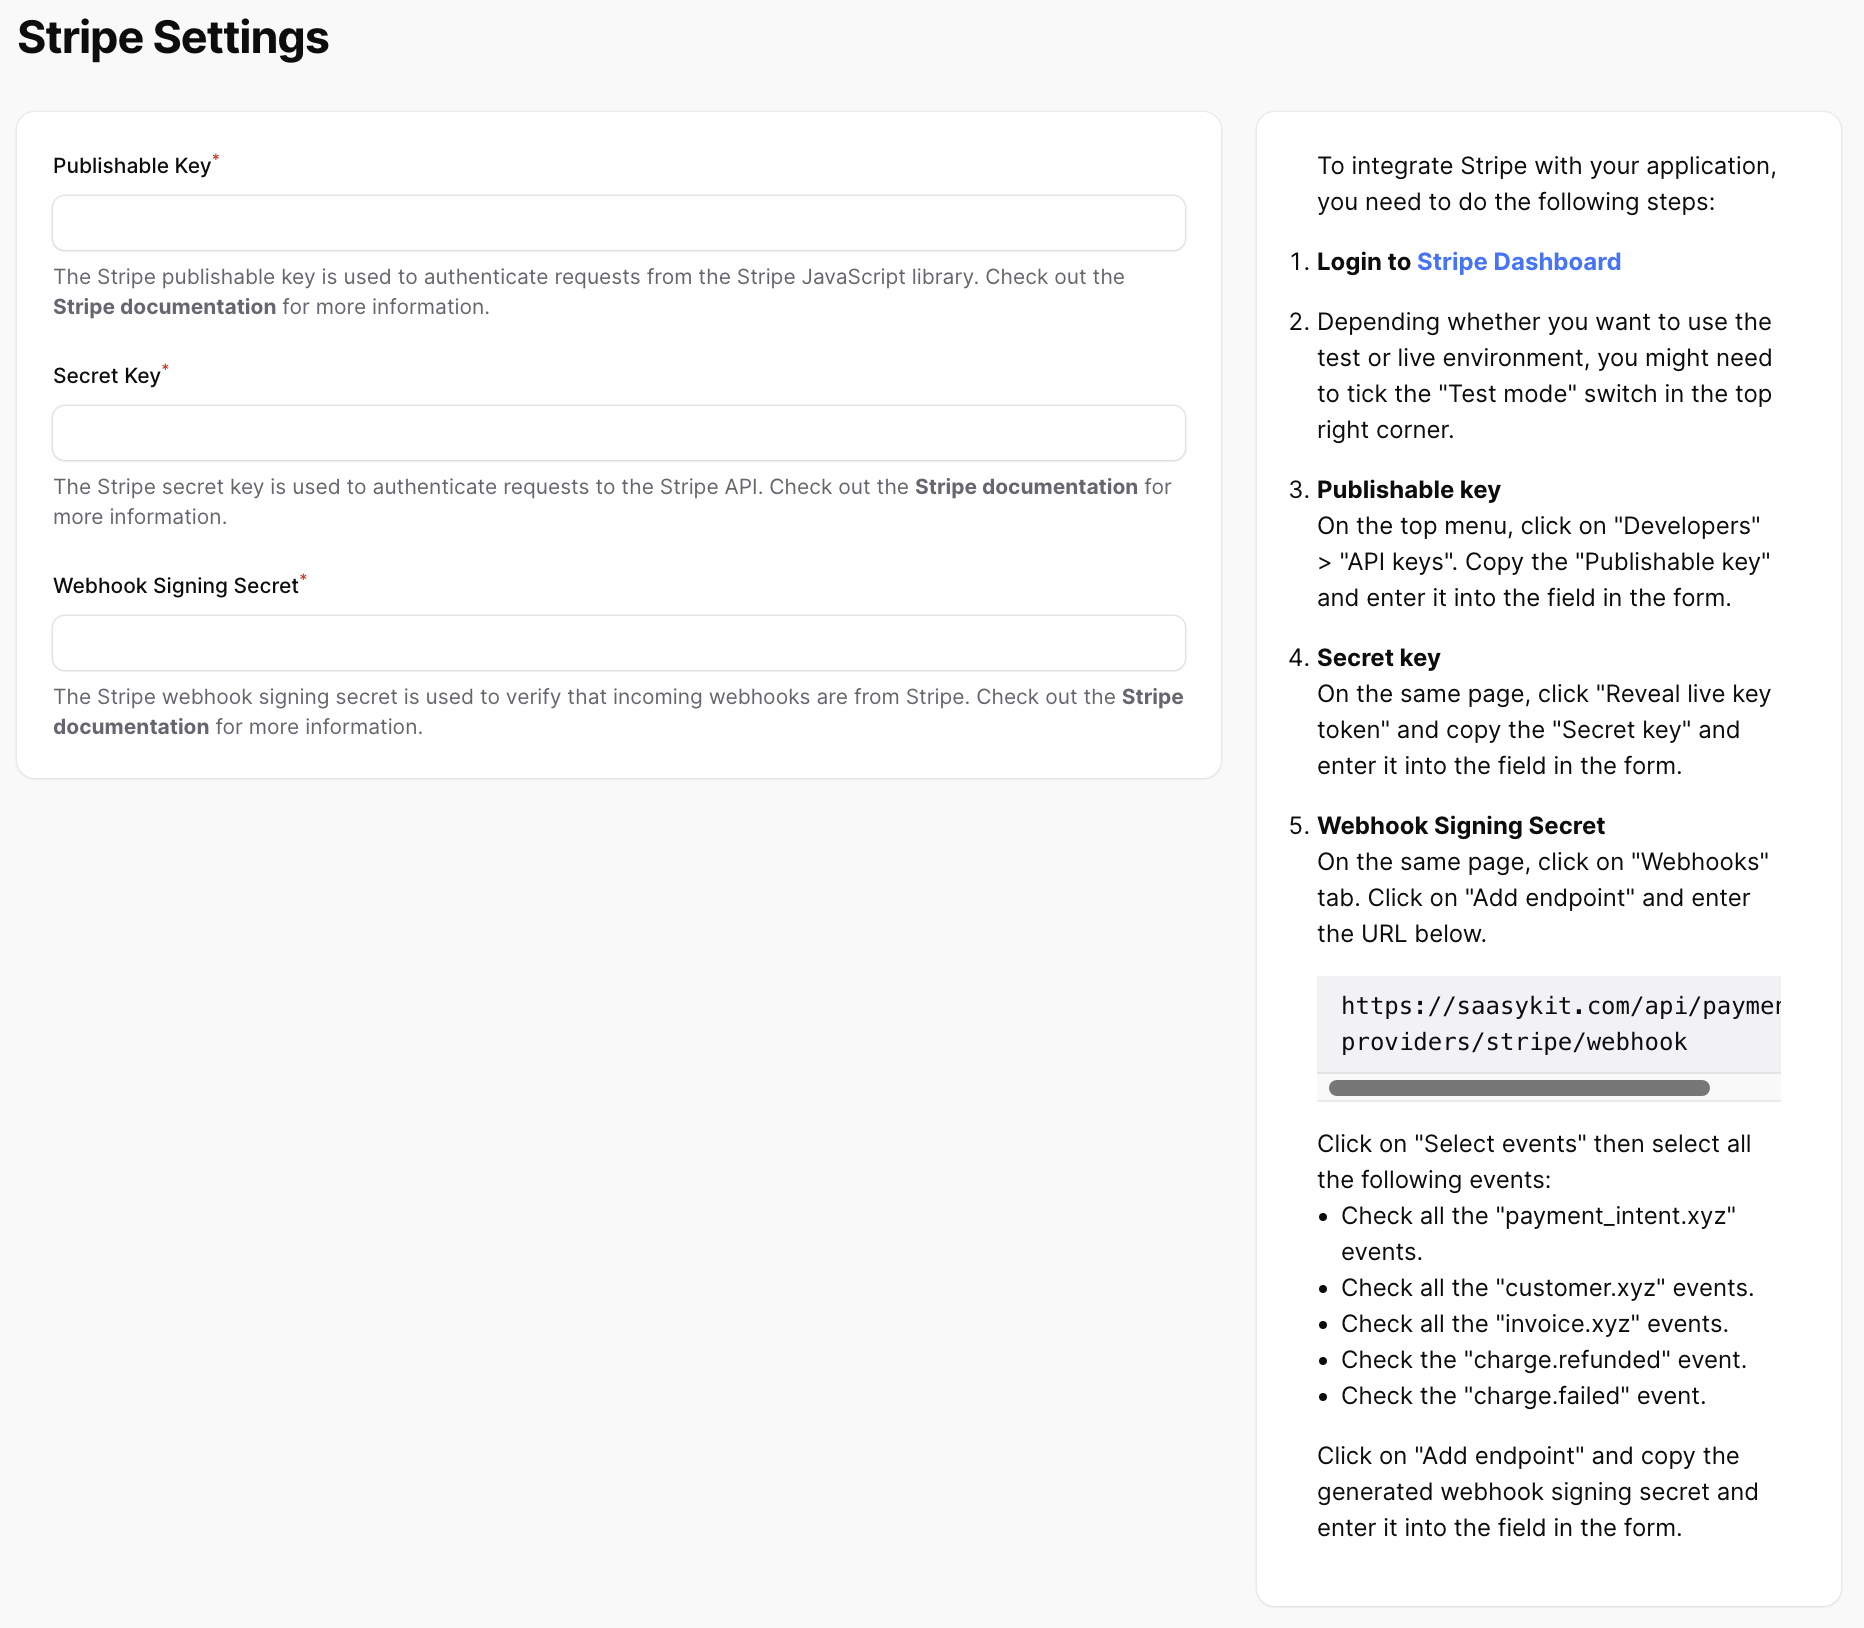
You will need to copy some values from your Stripe account to your application to be able to connect it. To do that please follow the following steps:
-
Login to Stripe Dashboard.
-
Depending on whether you want to use the test or live environment, you might need to tick the "Test mode" switch in the top right corner.
-
On the top menu, click on "Developers" > "API keys". Copy the "Publishable key" and enter it into the field in the form.
-
On the same page, click "Reveal live key token" and copy the "Secret key" and enter it into the field in the form.
-
On the same page, click on "Webhooks" tab. Click on "Add endpoint" and enter the URL below.
https://yourdomain.com/api/payments-providers/stripe/webhookReplace "yourdomain.com" with your actual domain name.
-
Click on "Select events" then select all the following events:
- Check all the "payment_intent.xyz" events.
- Check all the "customer.xyz" events.
- Check all the "invoice.xyz" events.
- Check the "charge.refunded" event.
- Check the "charge.failed" event.
-
Click on "Add endpoint" and copy the generated webhook signing secret and enter it into the field in the form.
-
Click on "Save" to save your changes.
All the above steps are also available to you inside your admin panel on the right hand side of the credentials page as shown in the image above.
Once you configure your Stripe settings, all you need to do is to define your plans and products in the admin panel and SaaSykit will create them automatically in your Stripe account and keep them in sync. You don't need to add any configurations config files or anything else.
Taxes
If you would like to calculate taxes for your products, you will need to consider adding the taxes in the prices of your products and plans.